How do I set the last booking time shown to customers in Rekaz?
To control how booking times are displayed on your website, open Website Options in Rekaz, choose the end-of-day time on the Design tab, and save your change.
This setting affects the display of bookings on the website. Review the selected time before saving.
Steps
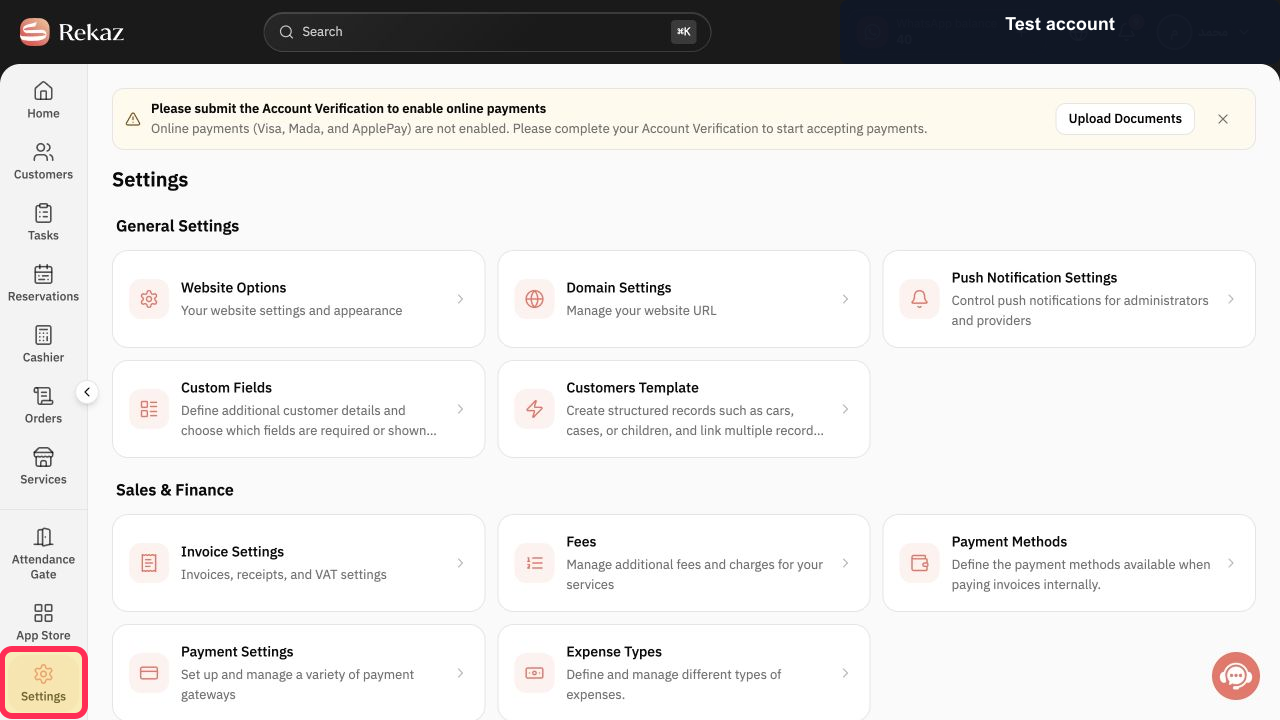
From the signed-in Rekaz dashboard, select Settings in the sidebar.
The Settings area opens.
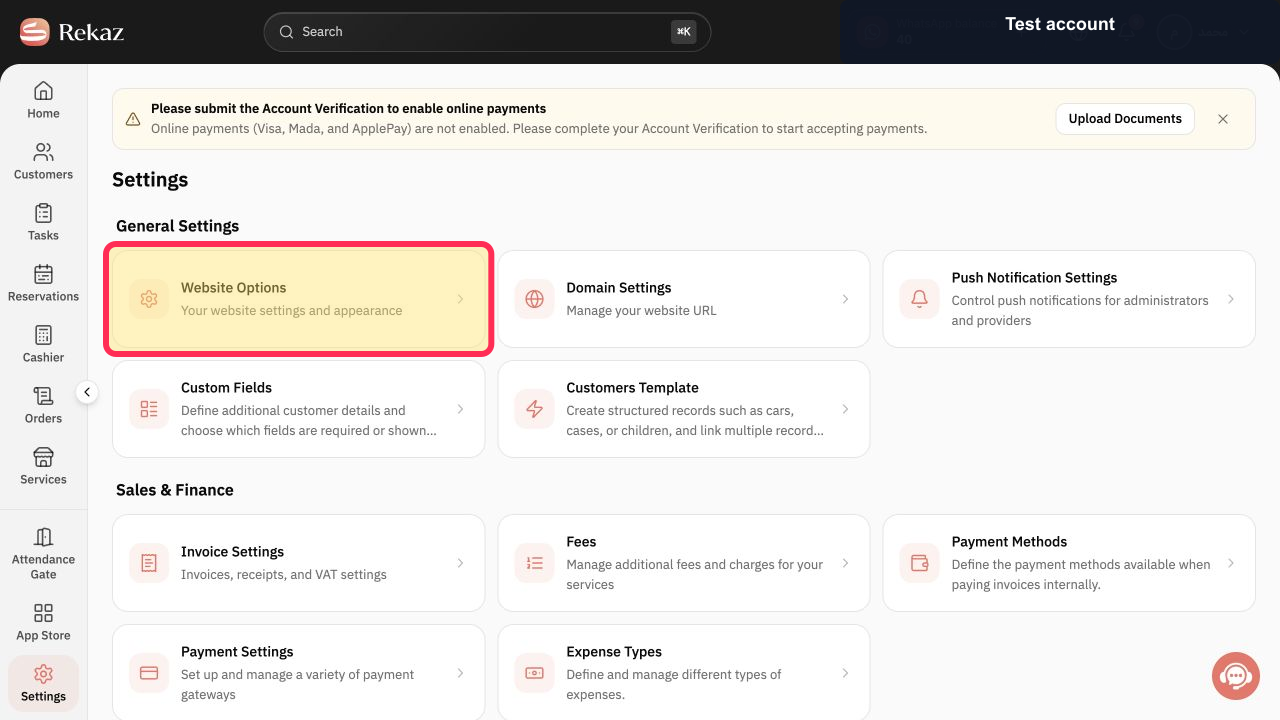
Select Website Options.
The Website Options page opens.
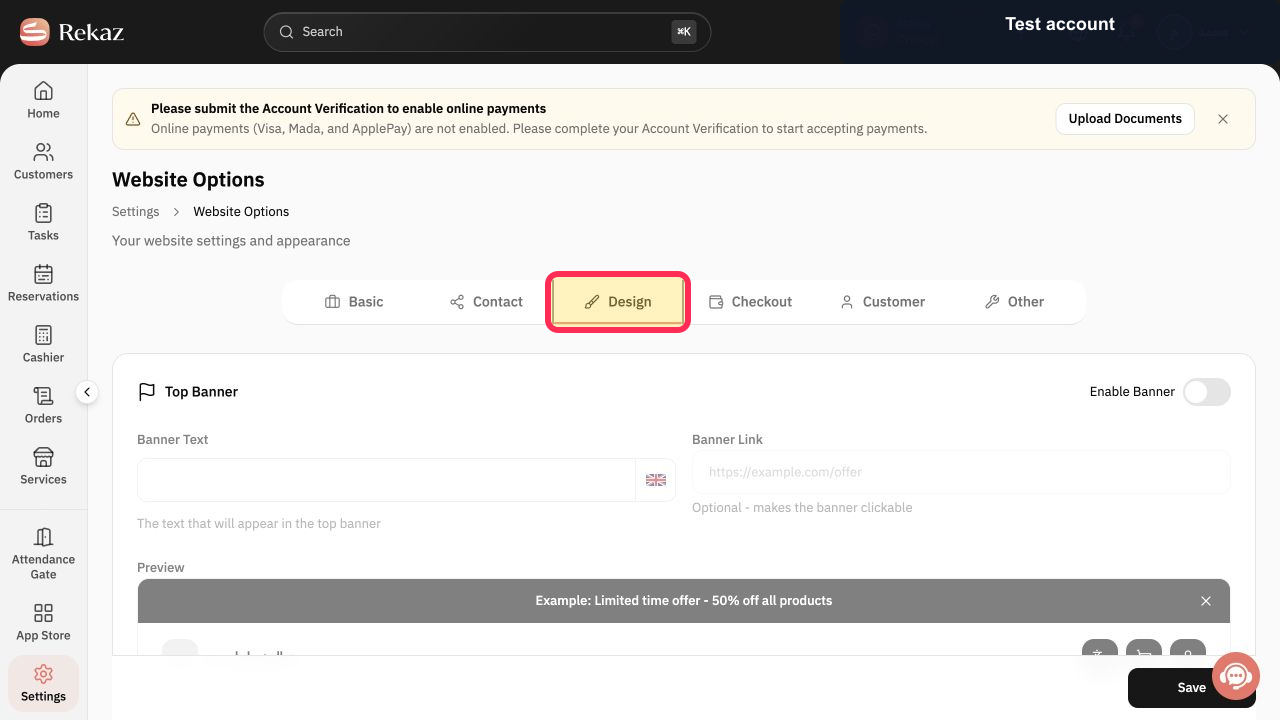
Open the Design tab.
The website design settings appear, including the end-of-day time option.
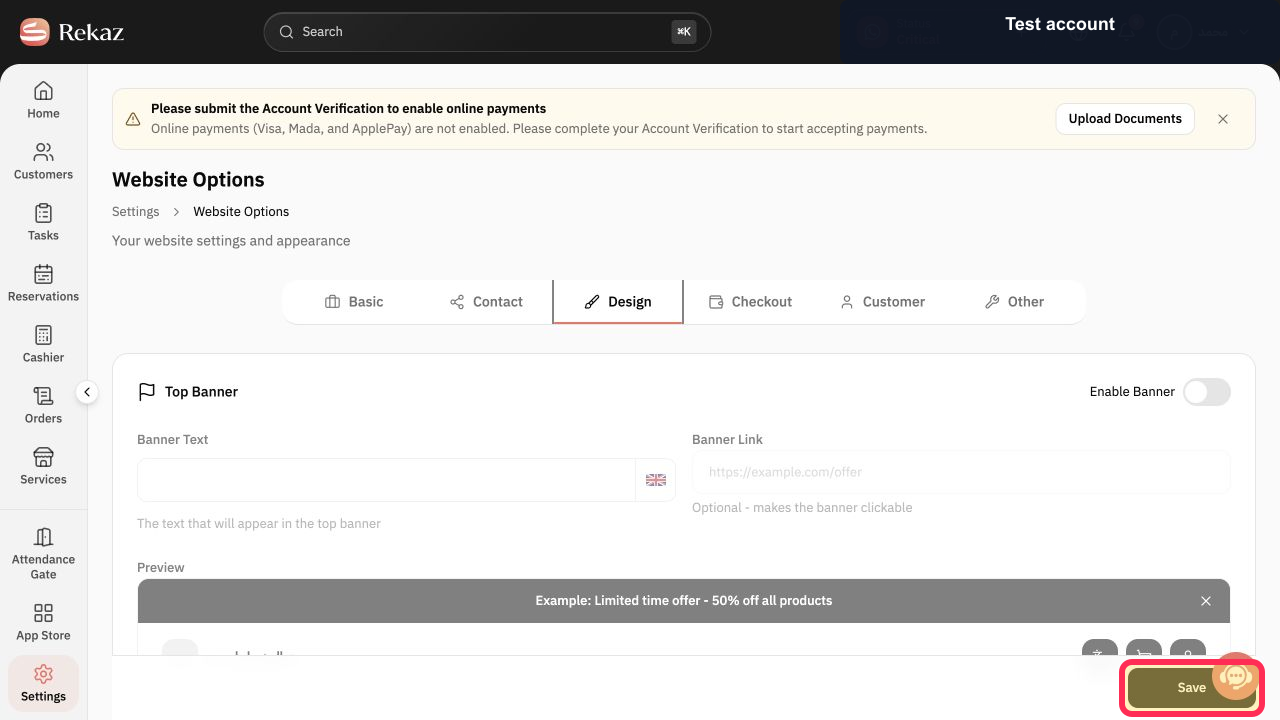
Choose the appropriate end-of-day time, review your selection, and select Save.
Your selected end-of-day time is saved.
Illustrated guide
Step 1: The Rekaz dashboard sidebar with Settings selected.
Step 2: The Settings area with Website Options ready to be selected.
Step 3: The Website Options page with the Design tab selected and the end-of-day time option visible.
Step 4: The selected end-of-day time reviewed before selecting Save.
Important
This setting affects how booking times are displayed on your website. It does not confirm an availability cutoff or prevent customers from booking at other times.
Related questions
How do I set the end of the booking day in Rekaz?
Where can I change the last time shown on my website in Rekaz?
How do I choose the last booking time displayed to customers in Rekaz?


