How do I manage a workspace business in Rekaz?
Use Rekaz’s reservation, provider, customer, package, and payment areas to run the operational parts of a workspace business. Configure when customers can book, how many reservations can share a slot, where services are available, and who can serve them.
The current interface does not show an dedicated workspace setup or a separate test-booking and test-payment procedure. Use the available settings below to manage the available operational controls.
Steps
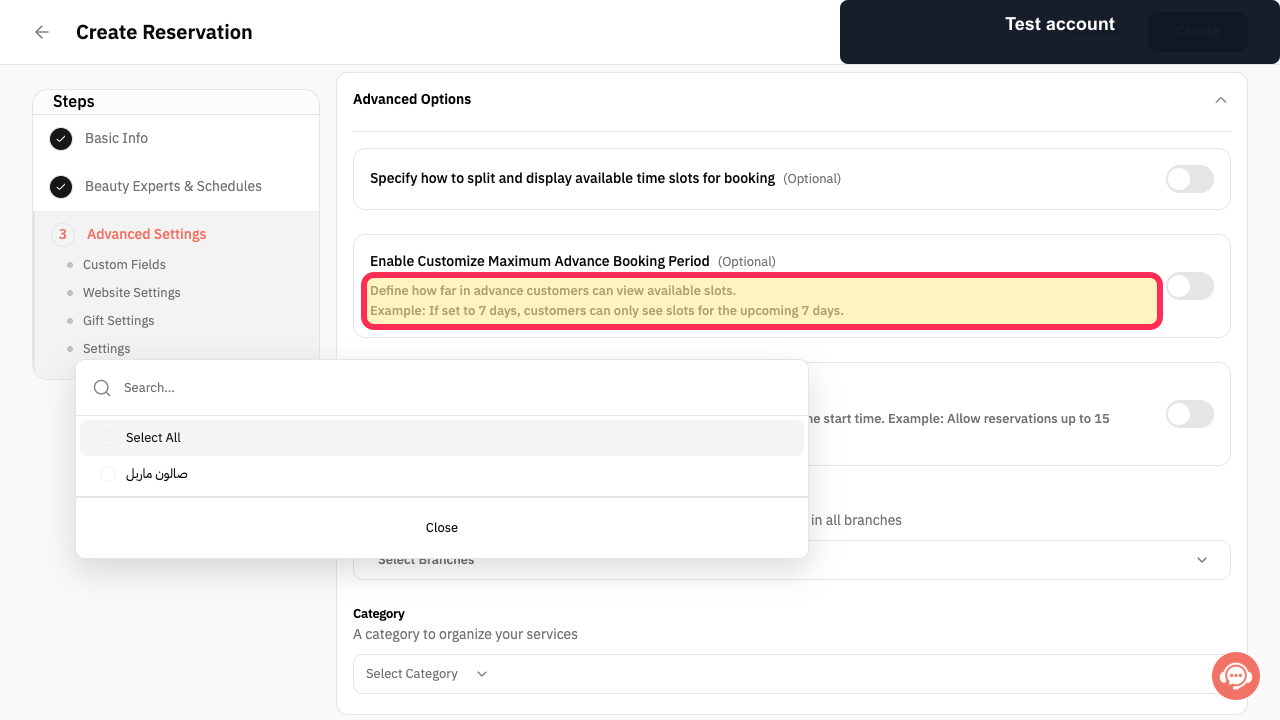
In reservation setup, review the advance-booking window and set it to the period during which customers should be able to view available slots.
The explanation of how far in advance customers can view available slots is visible.
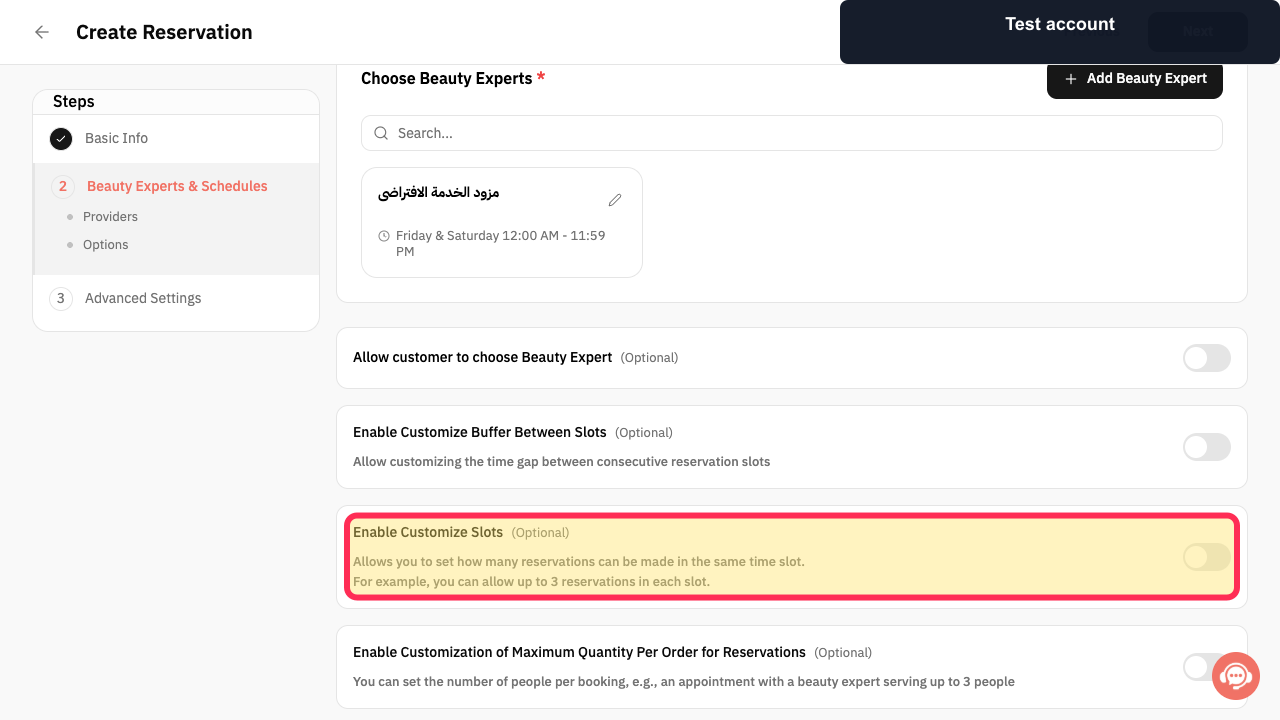
Enable customized slots only when you need to control how many reservations can be made in the same time slot.
The Customize Slots setting and its explanation are visible.
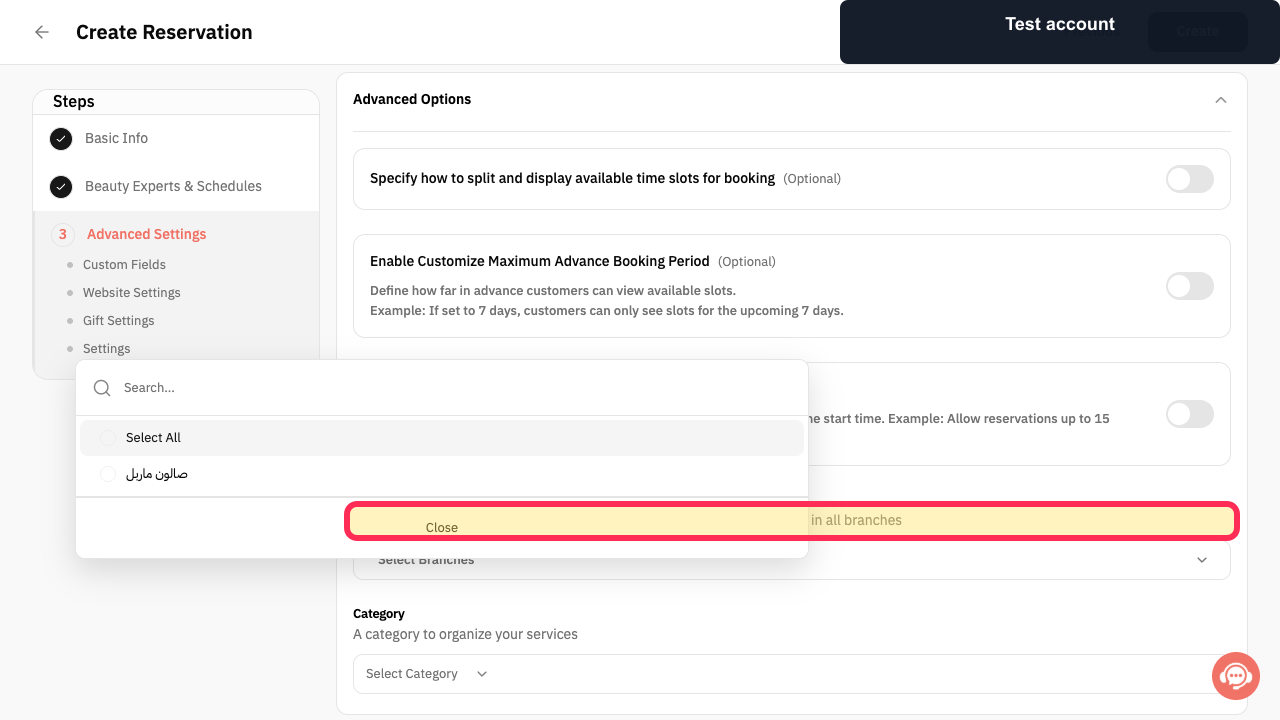
Use the branch availability setting to limit a reservation service to selected branches, or leave it empty to make the service available in all branches.
The branch-availability guidance is visible in reservation setup.
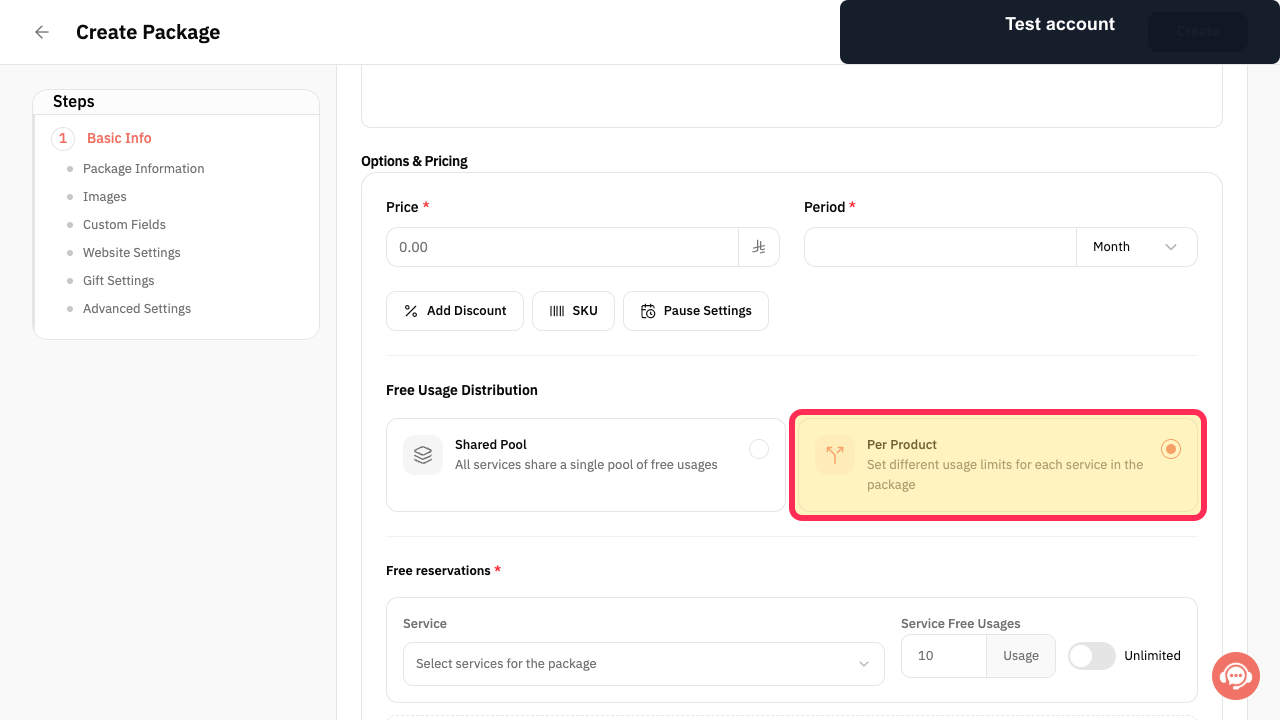
For a multi-use workspace offer, select Per Product when each service in the package needs its own usage limit.
The Per Product package-usage option is visible.
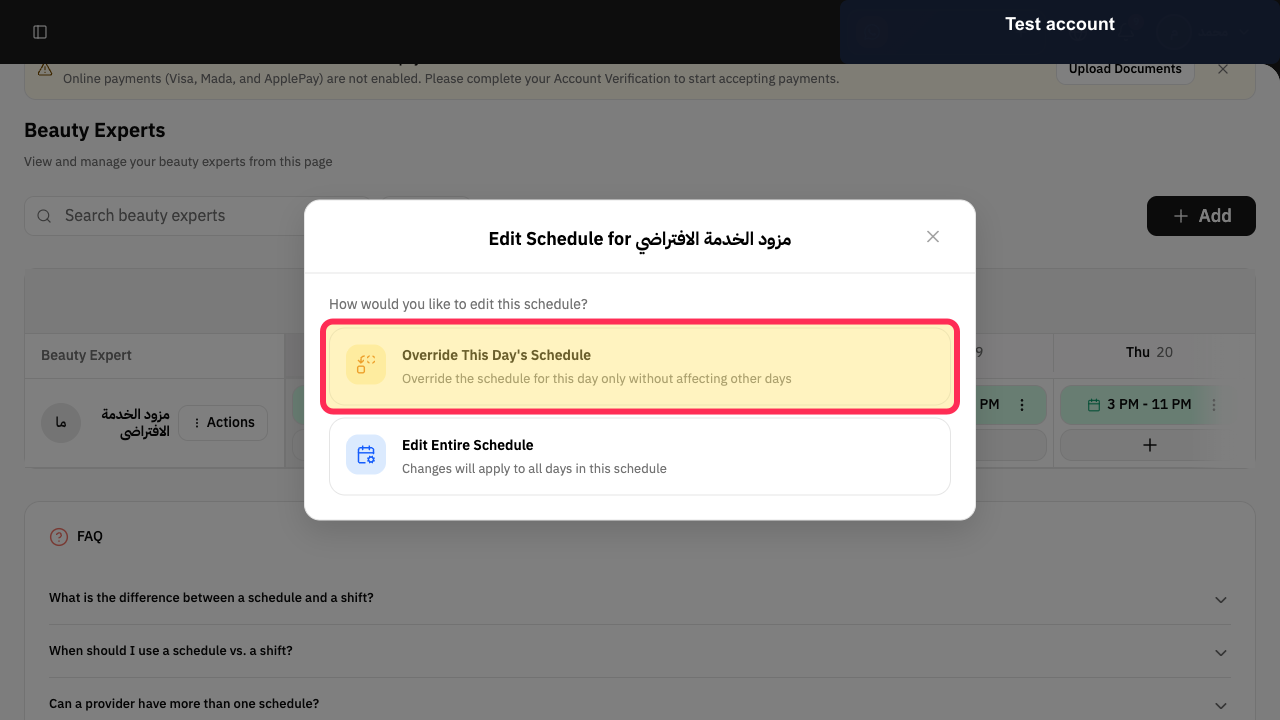
When a provider has a one-day availability exception, select Override This Day's Schedule to change that day without changing other days.
The one-day schedule override option is visible.
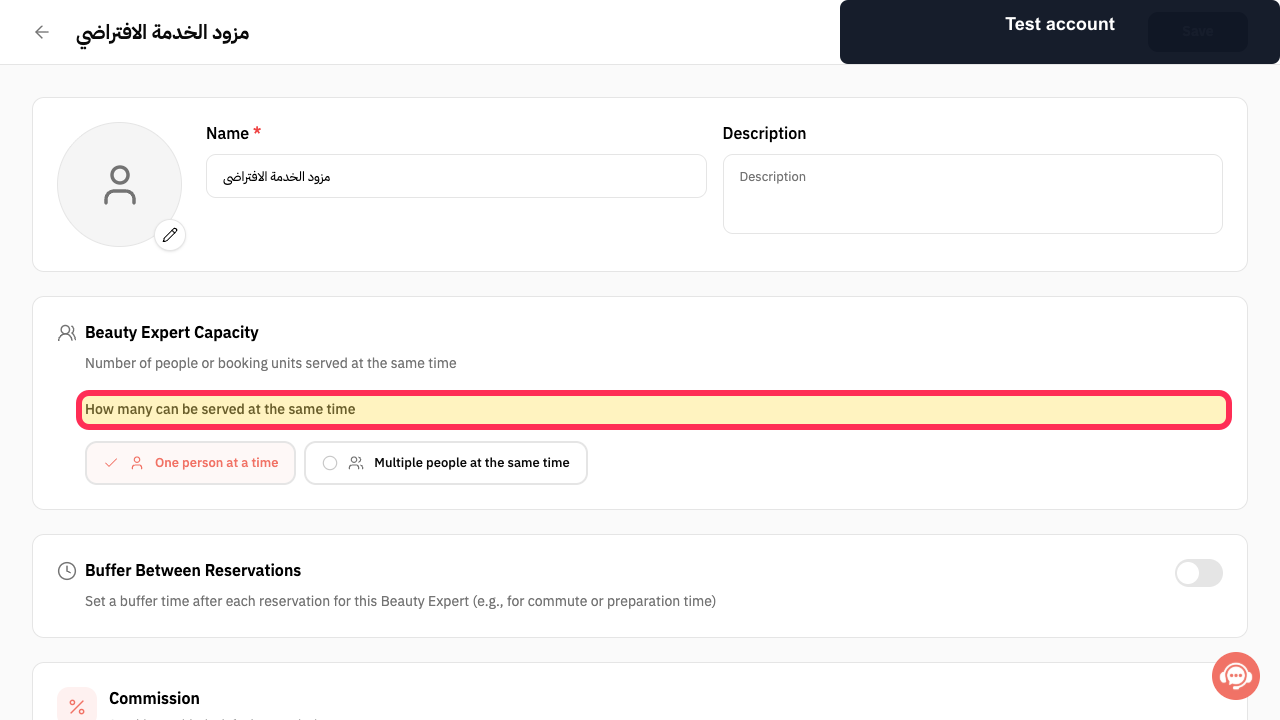
Review the provider capacity setting and set it to the number of customers that provider can serve at the same time.
The provider capacity setting is visible.
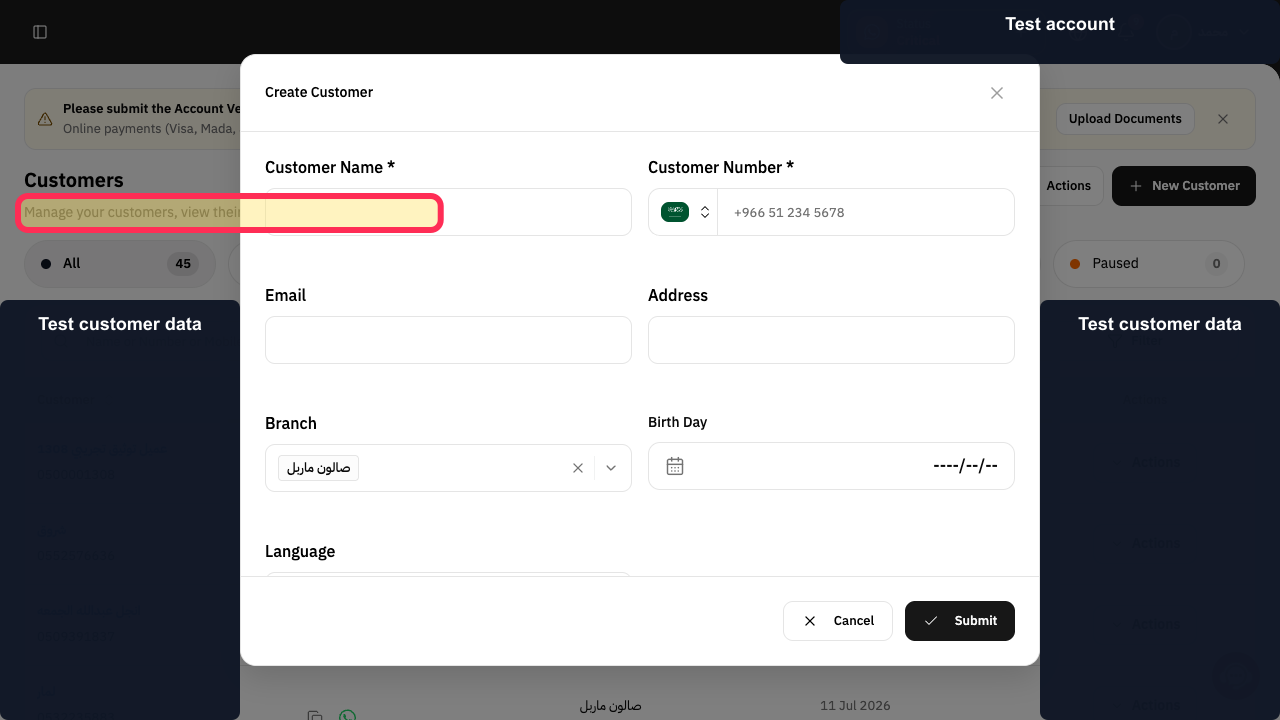
Use Customers to maintain customer records and review customer details and activity for workspace operations.
The Customers area describes customer management, details, and activity tracking.
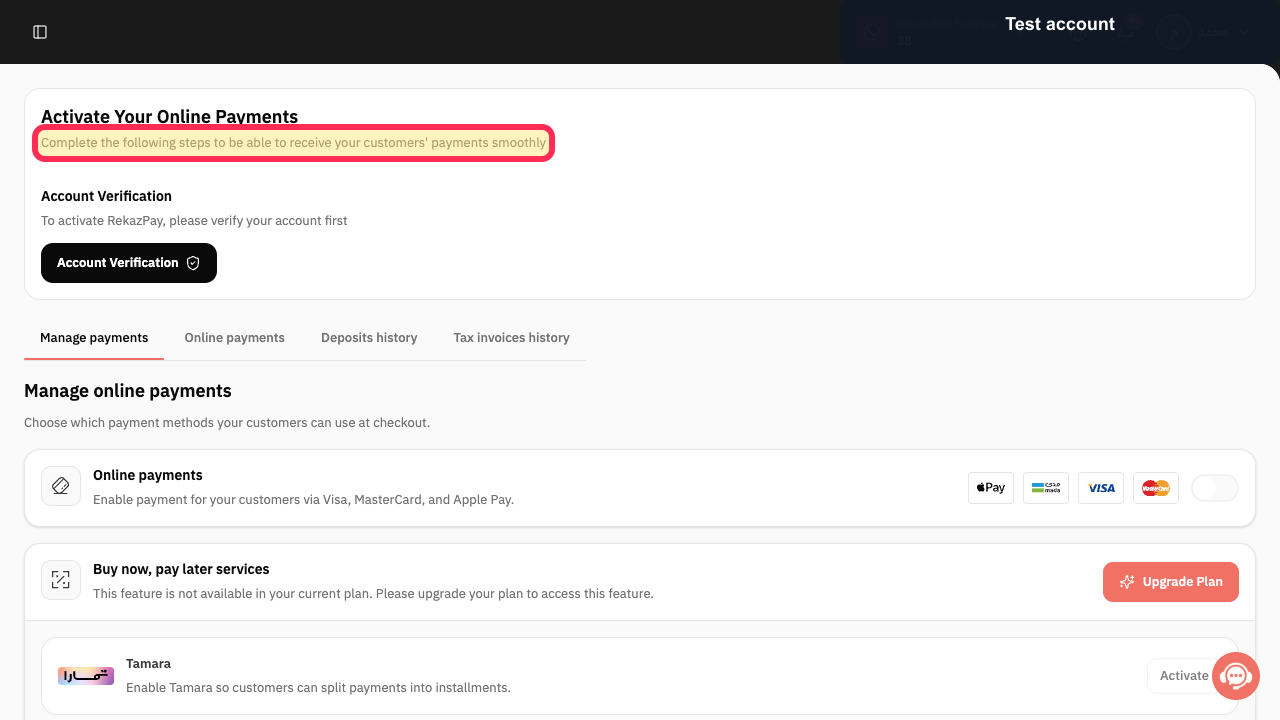
In Rekaz Pay, complete the displayed setup steps before accepting customer payments through the available payment flow.
The Rekaz Pay setup instruction for receiving customer payments is visible.
Illustrated guide
Step 1: Set how far ahead customers can see reservation slots.
Step 2: Control the number of reservations allowed in a time slot.
Step 3: Choose the branches where the reservation service is available.
Step 4: Set separate package usage limits for individual services.
Step 5: Override a provider’s schedule for one day only.
Step 6: Set how many customers a provider can serve simultaneously.
Step 7: Manage workspace customer records and activity.
Step 8: Complete Rekaz Pay setup before receiving customer payments.
Important notes and limitations
Start with a small model—one service and one Service Provider—then expand the setup only after you have tested it.
Review the detailed guide for each area before changing settings or opening bookings to customers.
This guide combines existing Rekaz workflows for workspace operations. It does not add a separate workspace-specific feature.
Related questions
How do I manage a meeting-room booking in Rekaz?
How do I set up a shared workspace in Rekaz?
How do I organise office subscriptions in Rekaz?


