How do I filter reports by date or branch in Rekaz?
On Sales Report, select Date range for the date filter. Then open Filters, use Branch to narrow the report, and apply the results.
Filter availability can vary between reports.
Steps
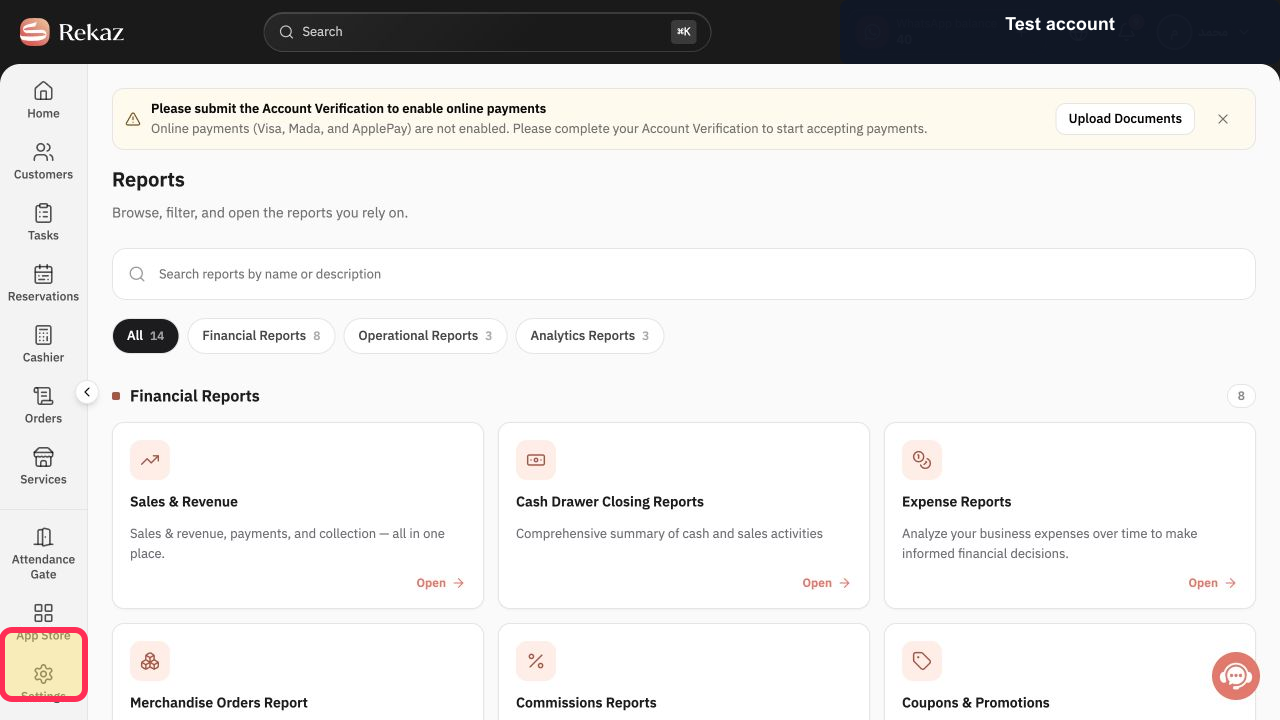
From the Rekaz sidebar, select Reports.
The Reports area opens.
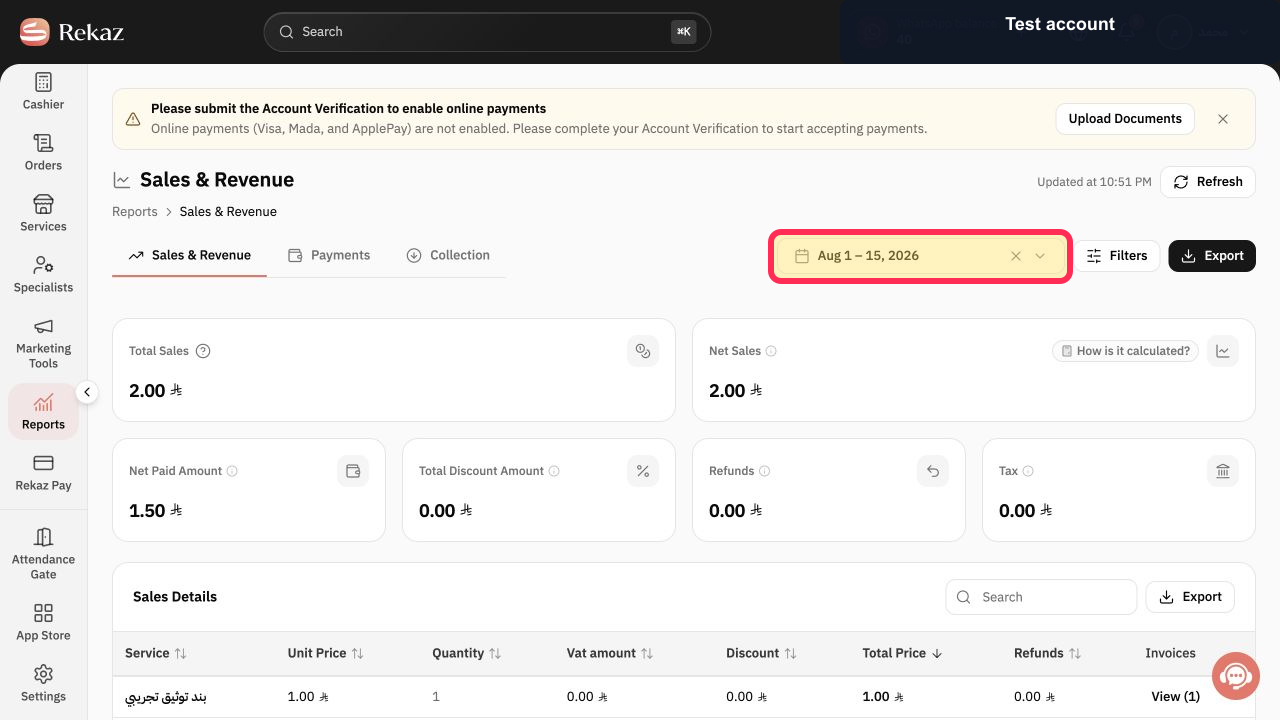
On Sales Report, select Date range to access the date-filter entry point.
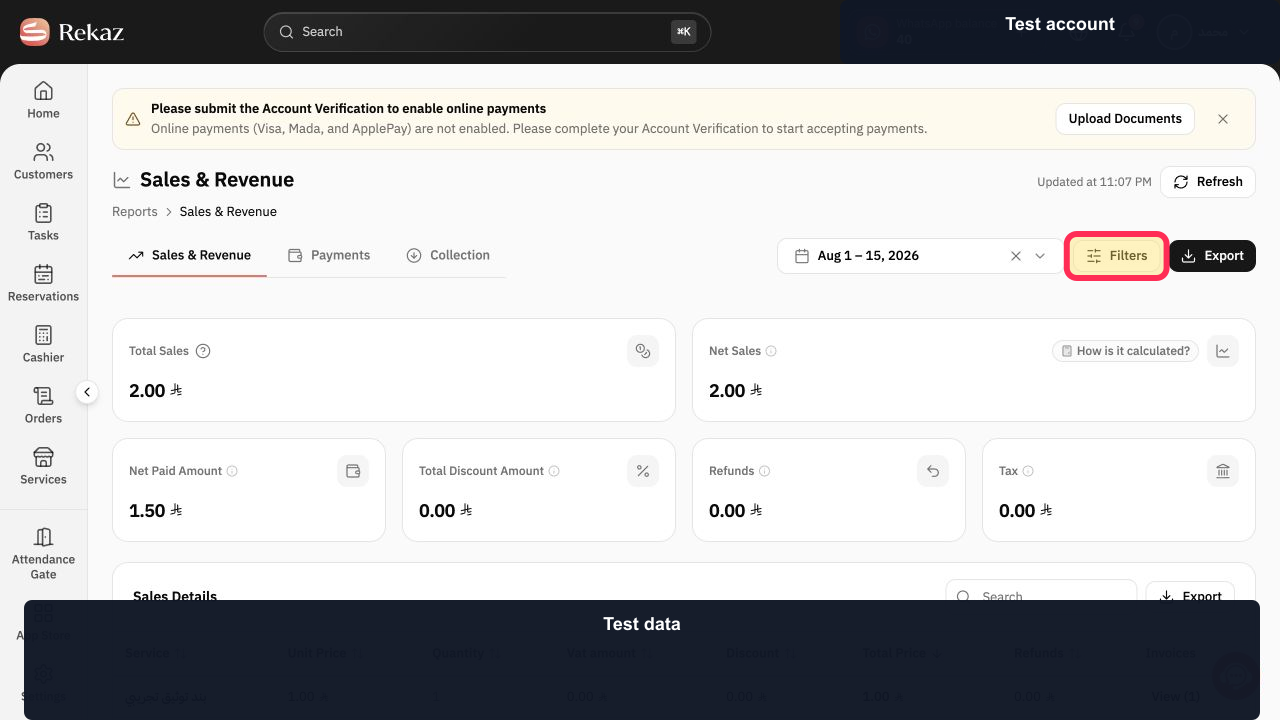
Select Filters on Sales Report.
The Filters panel opens with Branch and other available filters.
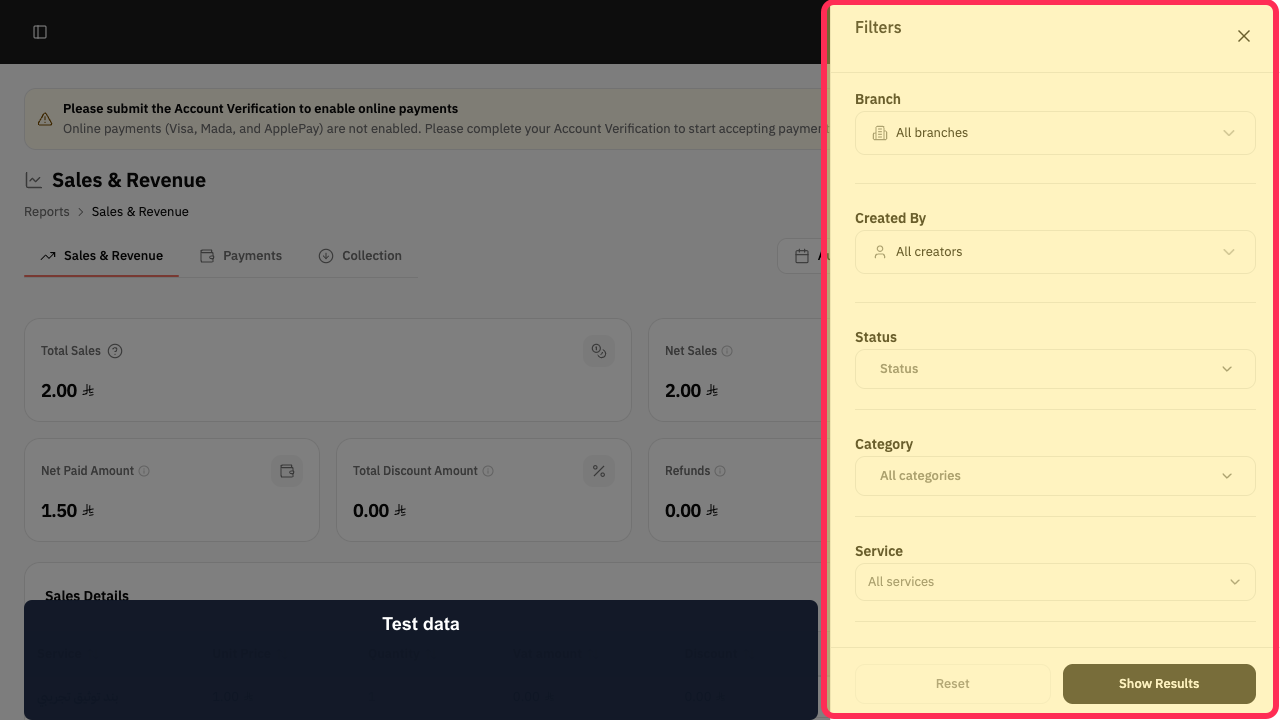
In the Filters panel, select Branch and choose the branch you want to include.
The Branch setting is ready to limit the report; it shows All branches when no branch is selected.
Select Show Results.
The report applies the selected branch and any other chosen filters.
Illustrated guide
Step 1: Select Reports from the Rekaz sidebar.
Step 2: Select Date range on Sales Report.
Step 3: Open the Sales Report Filters panel.
Step 4: Use the Branch setting in the Filters panel.
Step 5: Apply the selected Sales Report filters.
Available report filters
In addition to the branch filter, the filters panel can include creator, status, category, and service options.
Review the Date Range after applying filters to avoid viewing an unintended reporting period.
Related questions
How do I view a report for a specific branch in Rekaz?
How do I set the reporting period in Rekaz?
Where can I find report filters in Rekaz?


