How do I create a gift in Rekaz?
Create a Gift service in Rekaz from Services. Set the gift name and amount, add optional media or questions, configure the website presentation and coupon validity, then choose its branches and category.
The Gift is not created until you select Create at the top of the page.
Steps
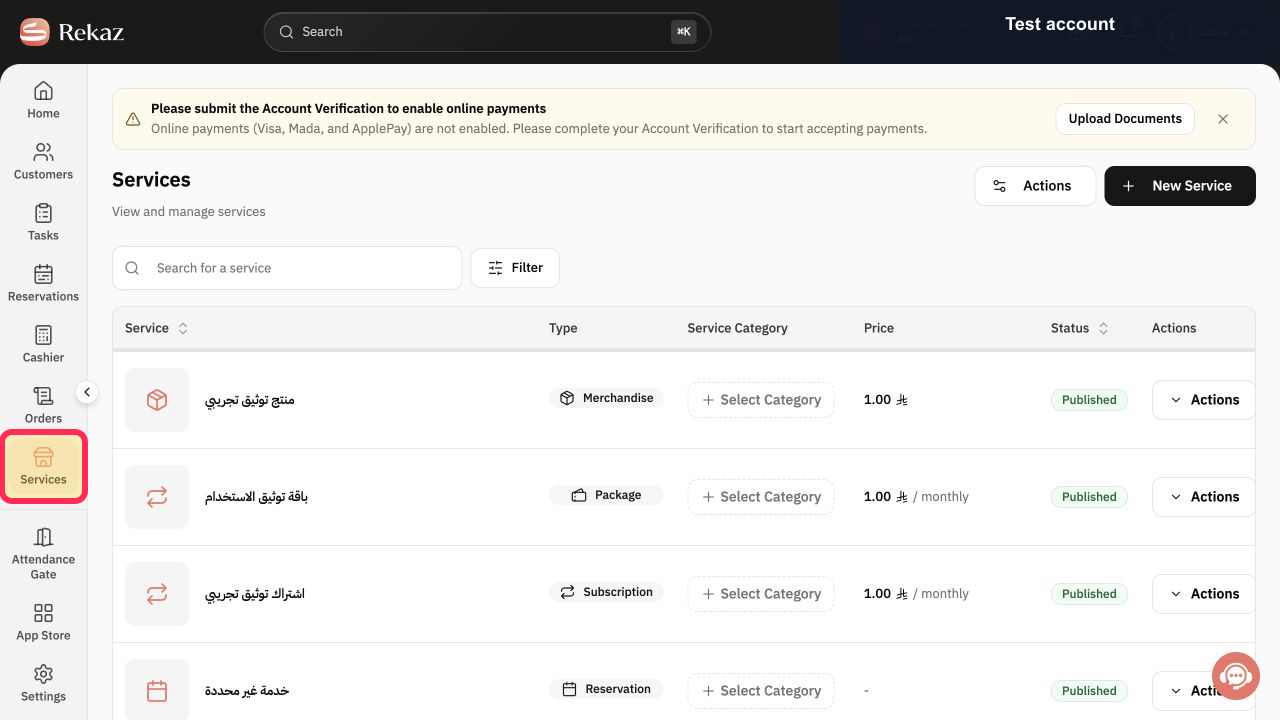
Select Services in the Rekaz sidebar.
The Services page opens.
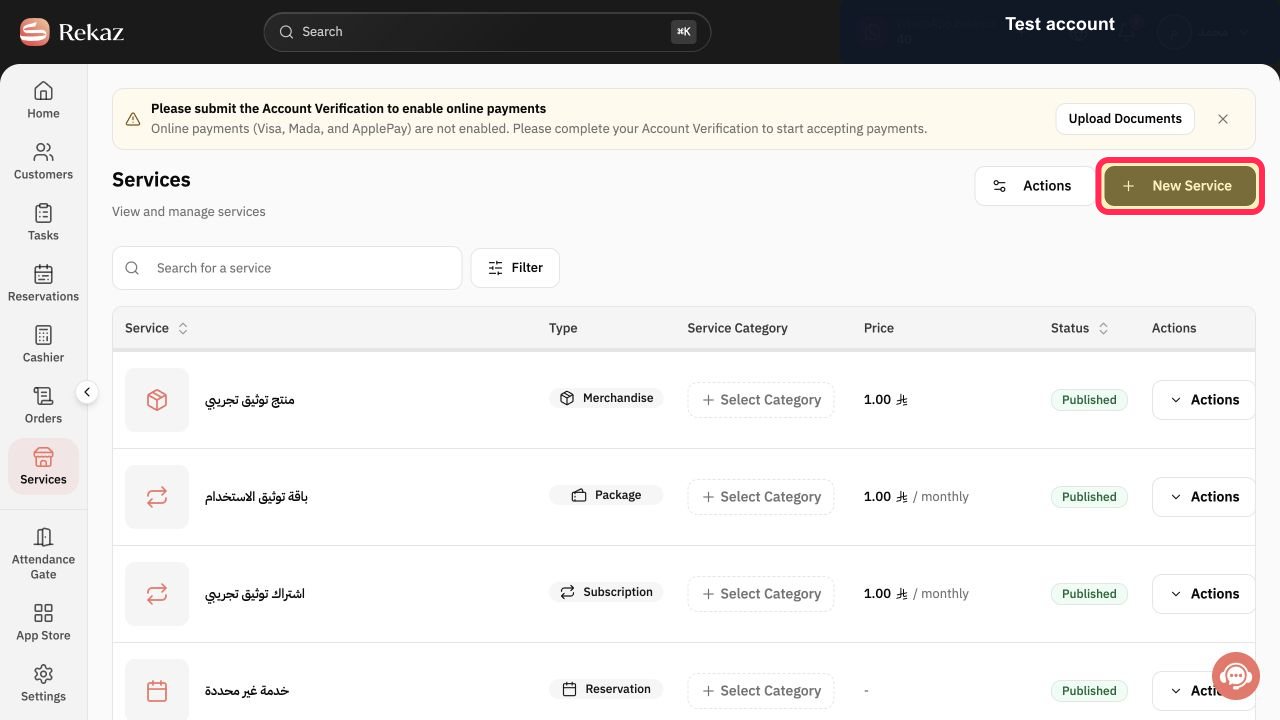
Select New Service.
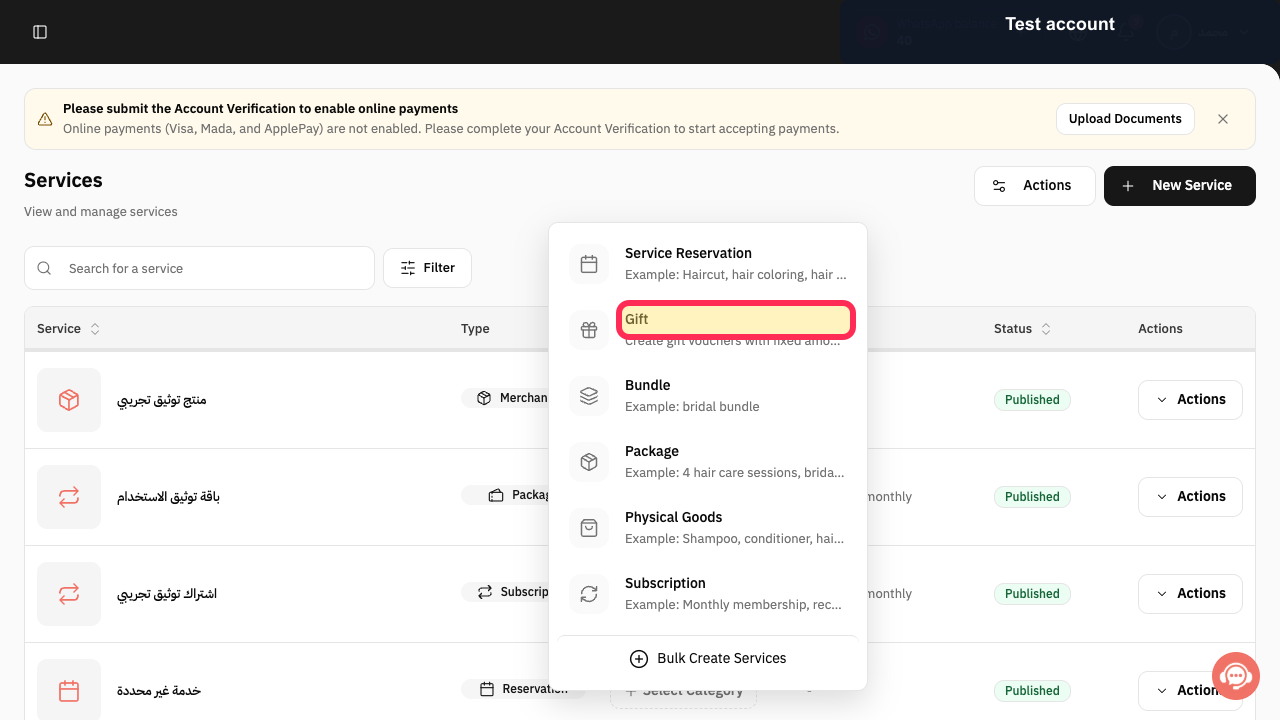
The New Service type menu opens.
Select Gift.
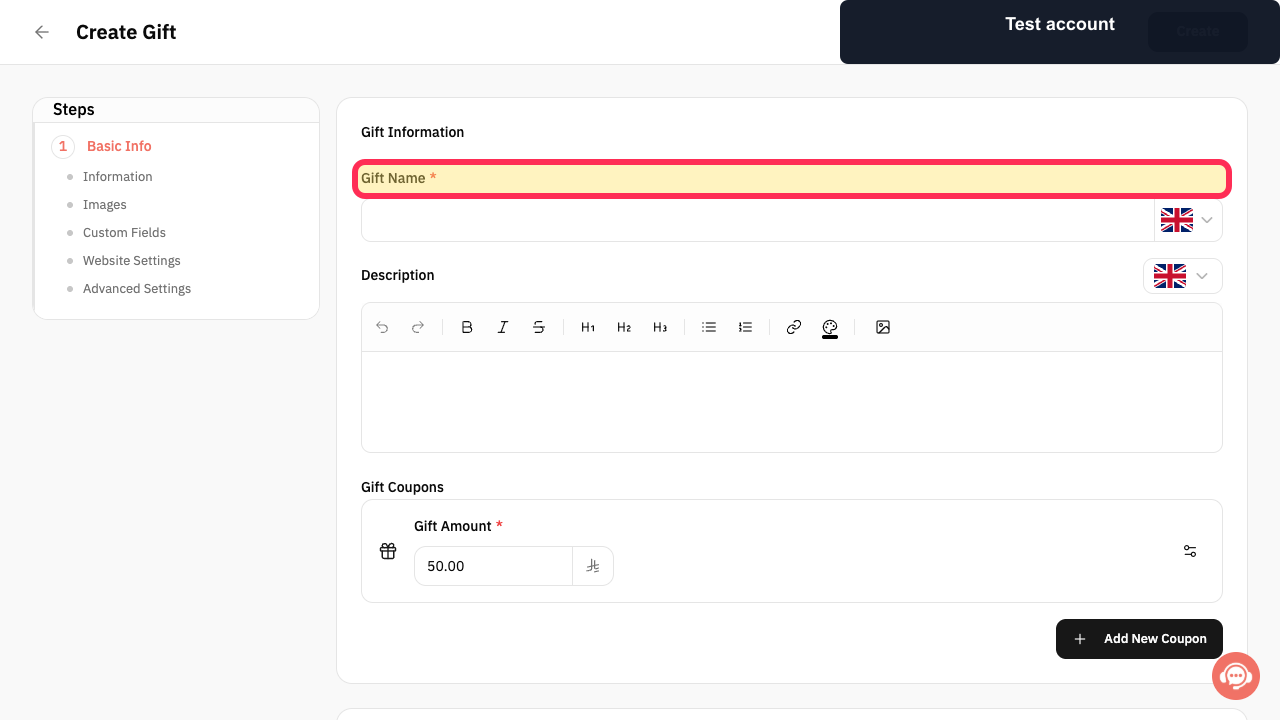
The Create Gift form opens.
Enter Gift Name and, when useful, add a Description.
The gift name and description are entered.
Enter the fixed value in Gift Amount.
The gift coupon amount is configured.
Optional: select Add New Coupon when the Gift should offer another fixed coupon amount.
Another gift-coupon amount can be added.
Optional: under Images Gallery, select the upload area or drop the gift images onto it.
The selected images are added to the Gift gallery.
Optional: select Add Custom Field to ask the buyer for additional information.
A custom question can be configured for the Gift order.
Open Website Settings.
The Gift website and SEO controls expand.
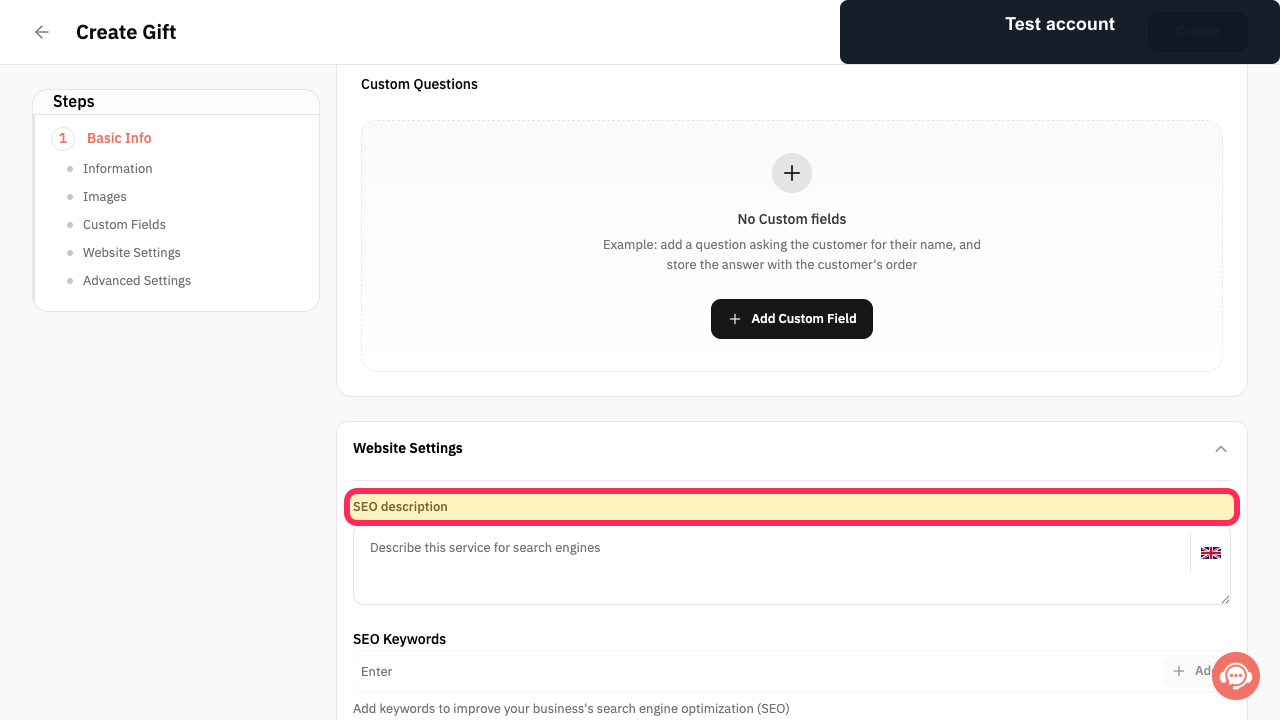
Enter the SEO description, SEO Keywords, Service URL Slug, and Short Description that should appear on the Gift page.
The Gift's search and website text are configured.
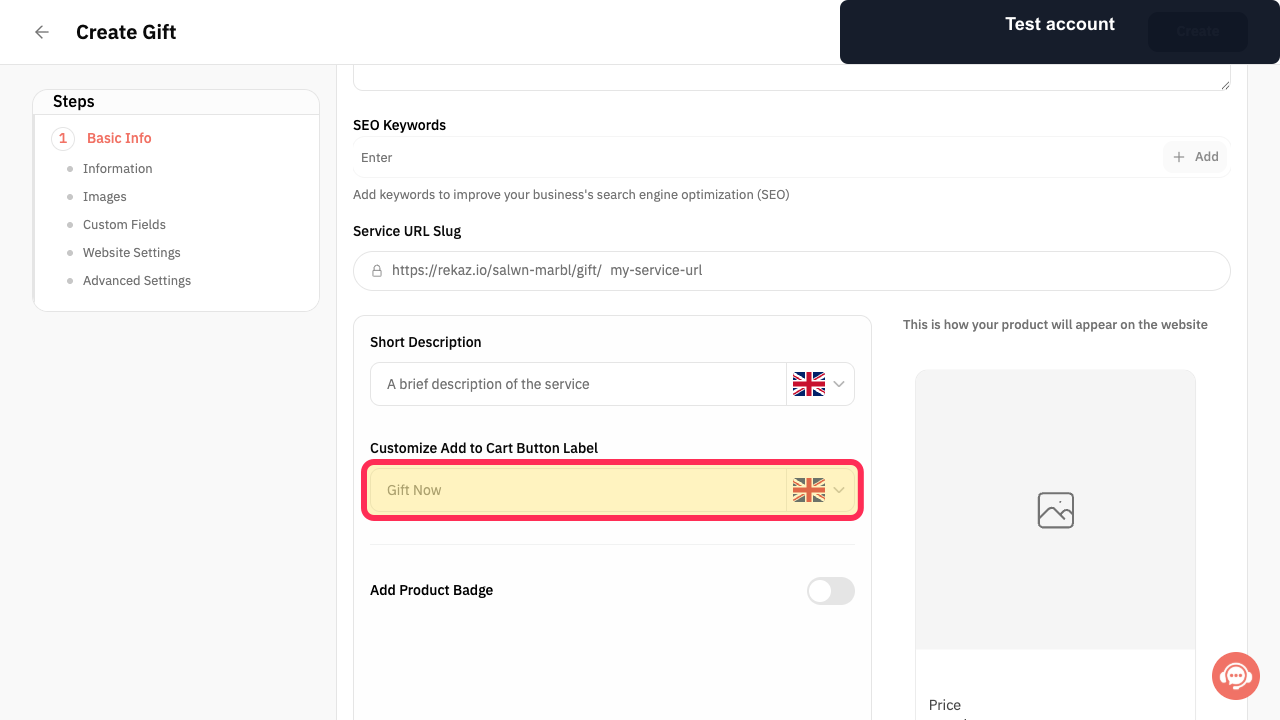
Review Customize Add to Cart Button Label, Add Product Badge, and the website preview.
The Gift's website presentation matches the intended design.
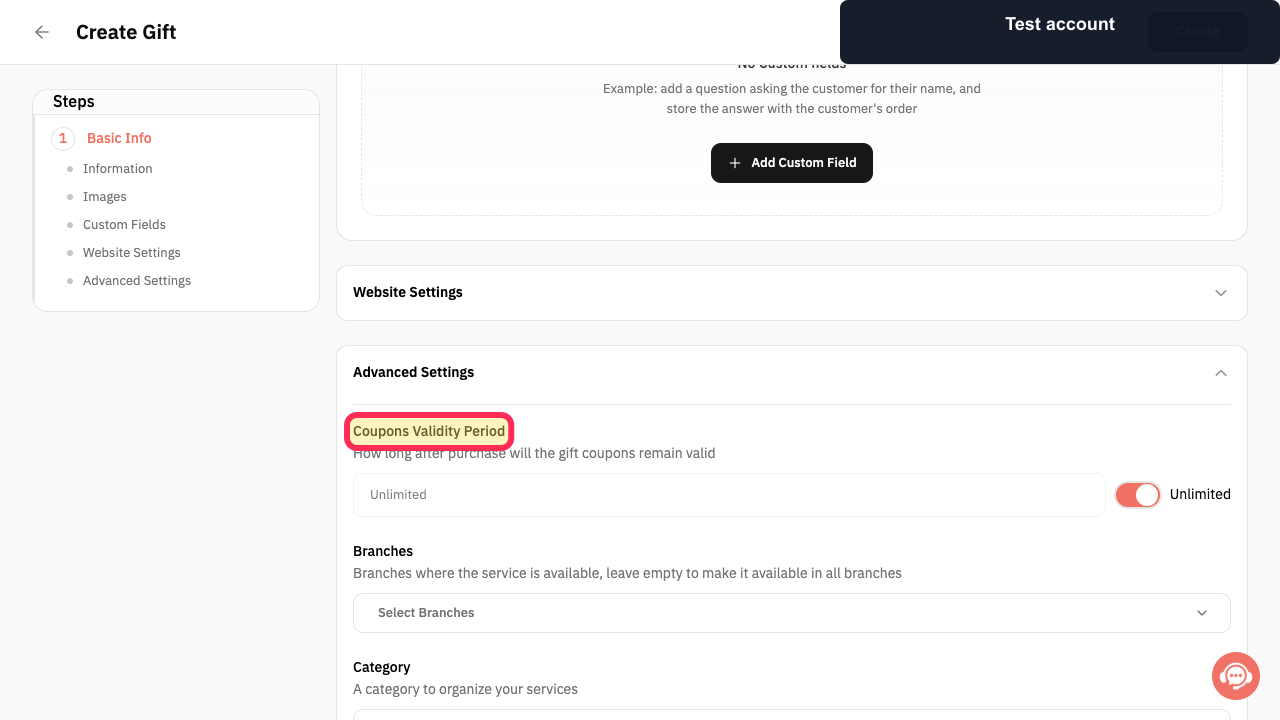
Open Advanced Settings and set Coupons Validity Period, or keep Unlimited enabled.
The Gift coupon-validity rule is configured.
Select Select Branches when the Gift should be limited to specific branches; leave it empty for all branches.
The Gift branch availability is configured.
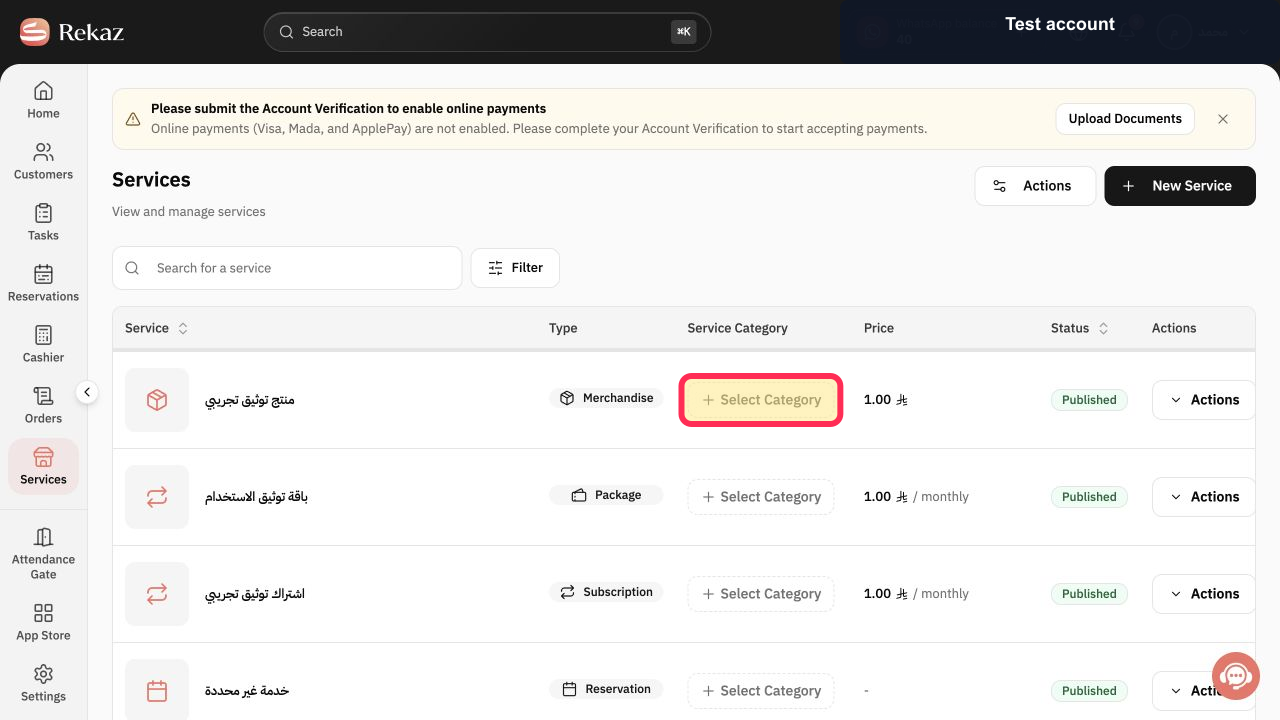
Choose Select Category to organize the Gift.
The Gift category is selected.
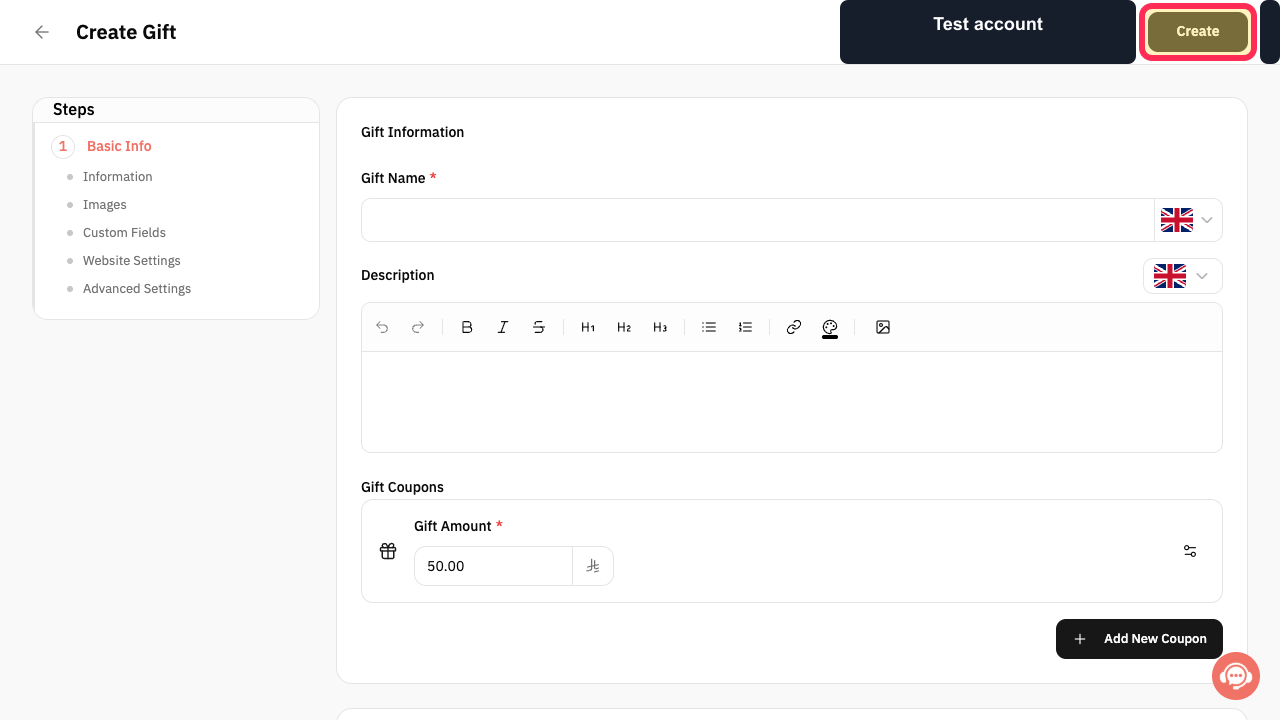
Review the complete form and select Create at the top of the page.
The Gift is submitted for creation.
Illustrated guide
Step 1: Open Services from the Rekaz sidebar.
Step 2: Open the New Service menu.
Step 3: Choose Gift as the service type.
Step 4: Enter the Gift name and description.
Step 5: Set the Gift Amount.
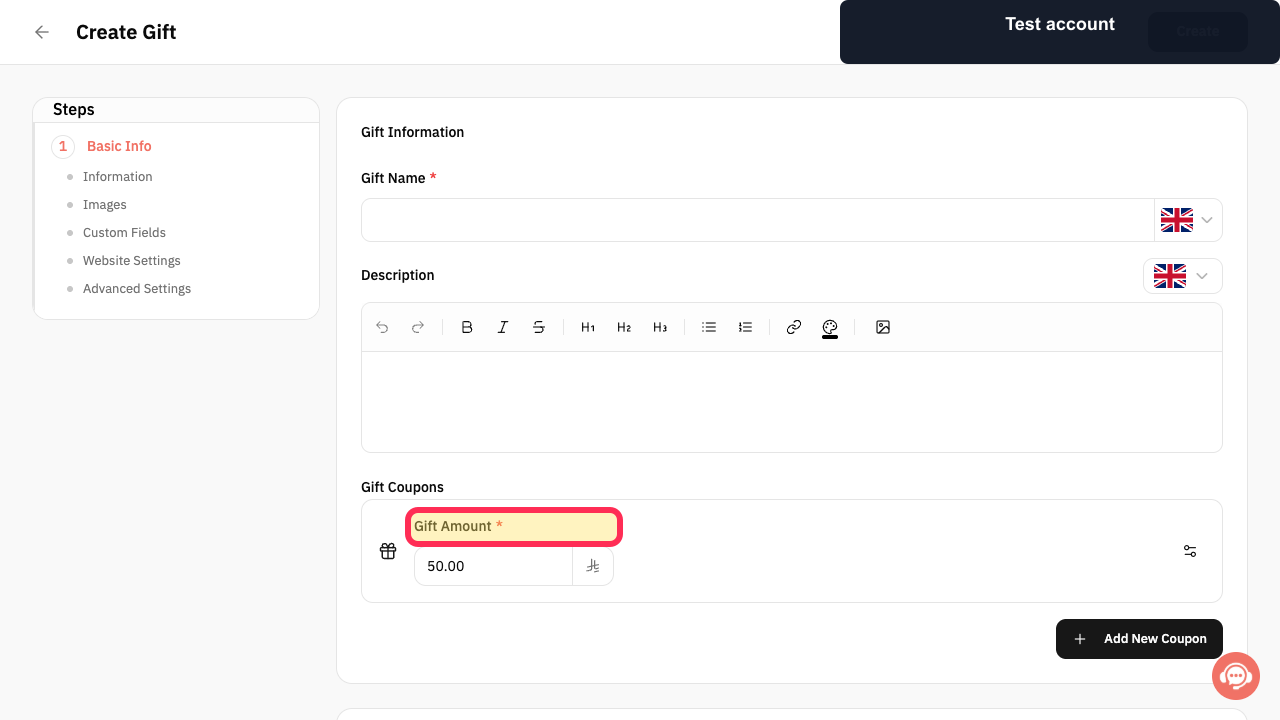
Step 6: Add another Gift coupon amount when needed.
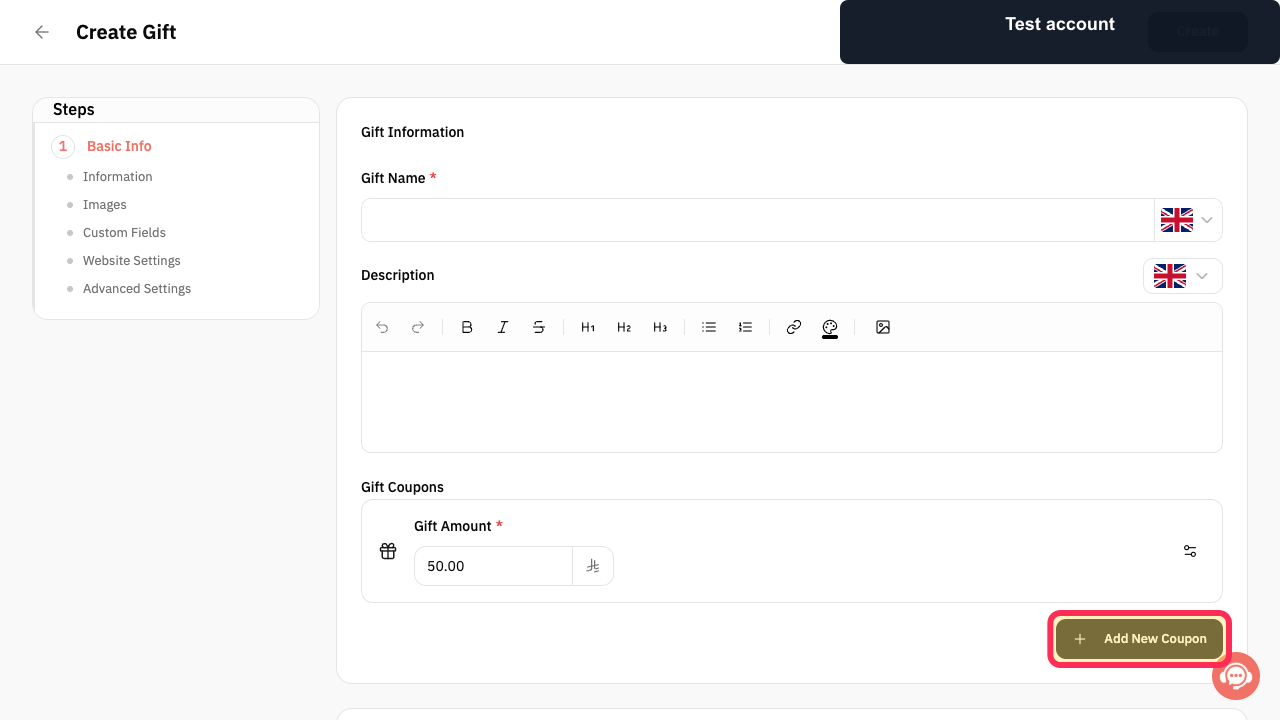
Step 7: Upload images in the Gift Images Gallery.
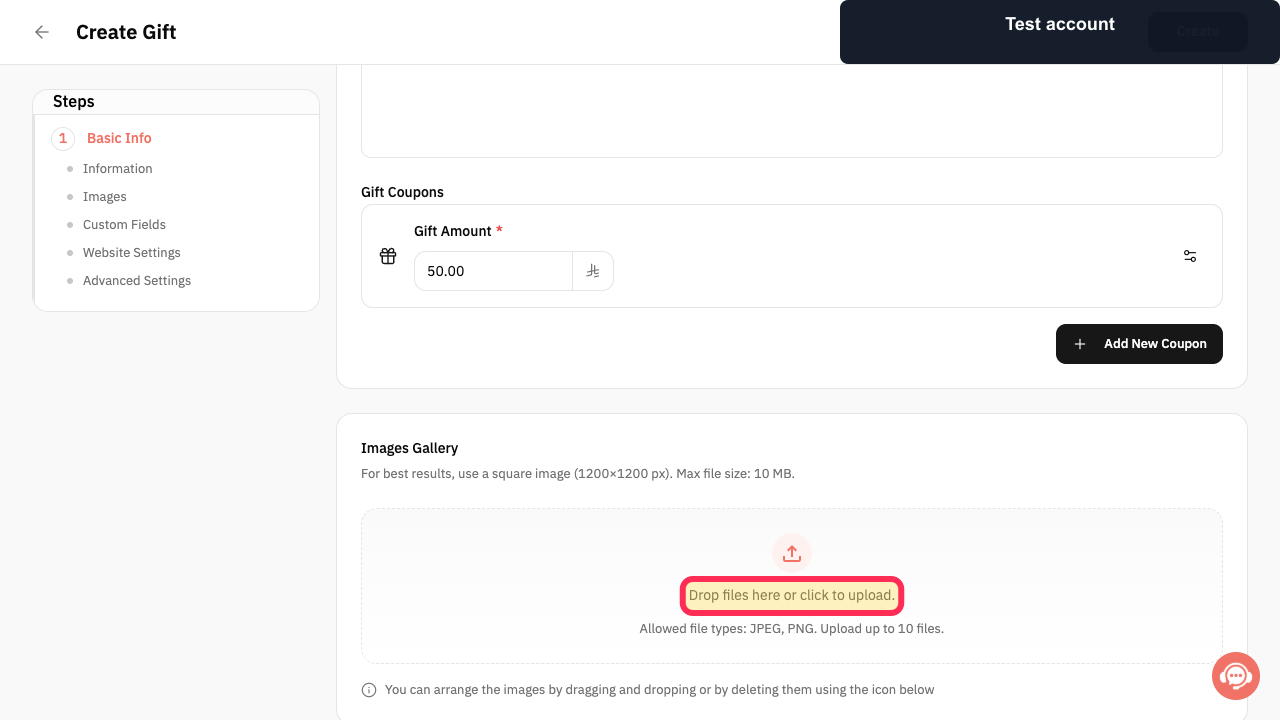
Step 8: Add a custom Gift question.
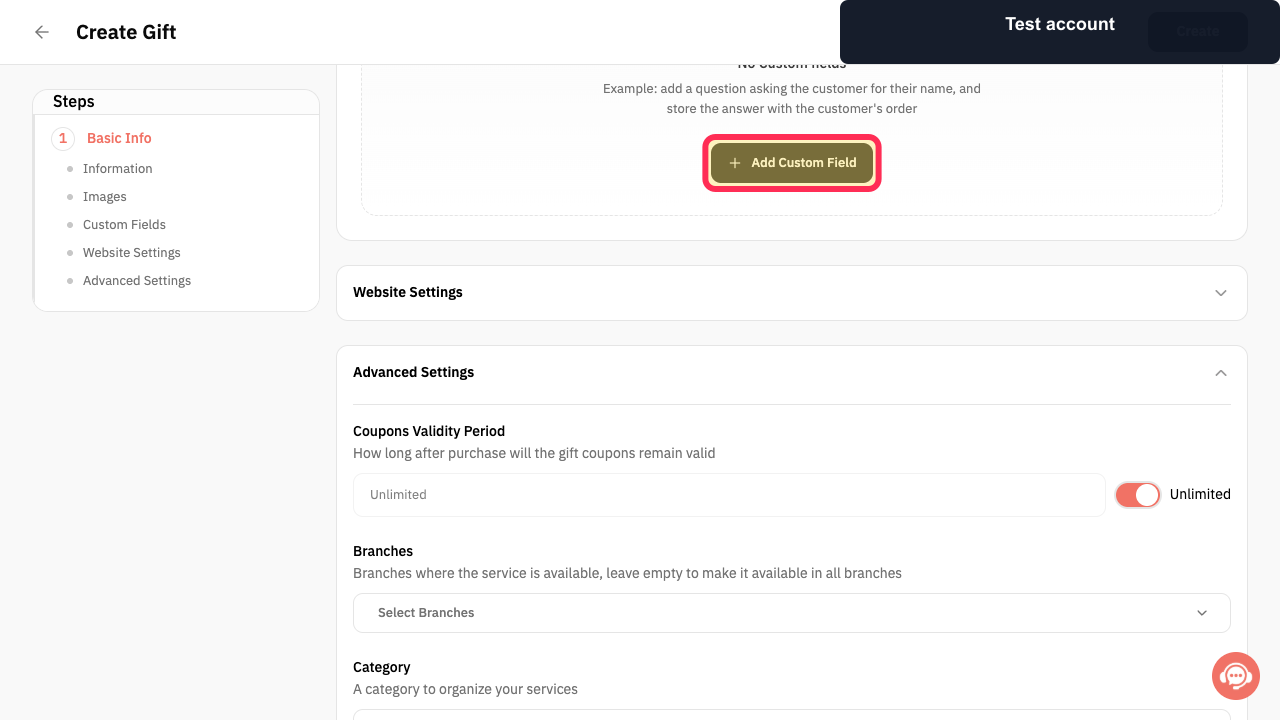
Step 9: Open the Gift Website Settings.
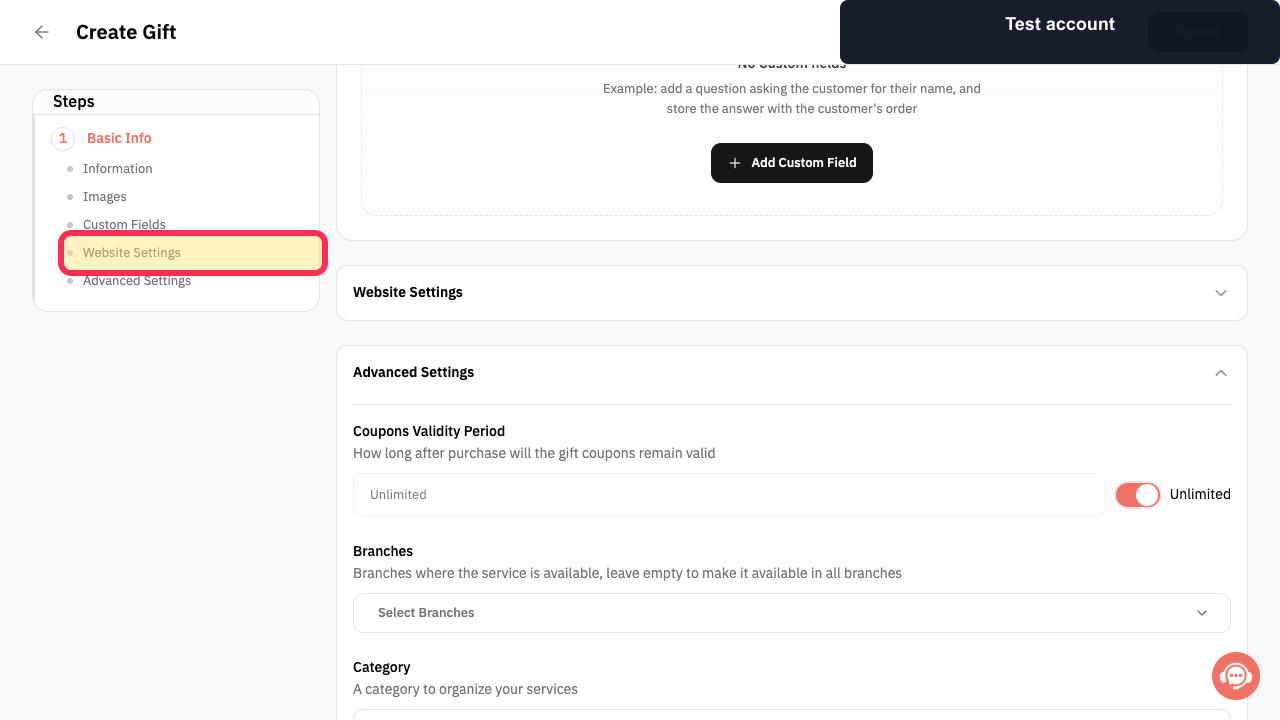
Step 10: Configure the Gift SEO and website text.
Step 11: Review the Gift button label, badge, and preview.
Step 12: Set the Gift coupon validity period.
Step 13: Choose the branches that accept the Gift.
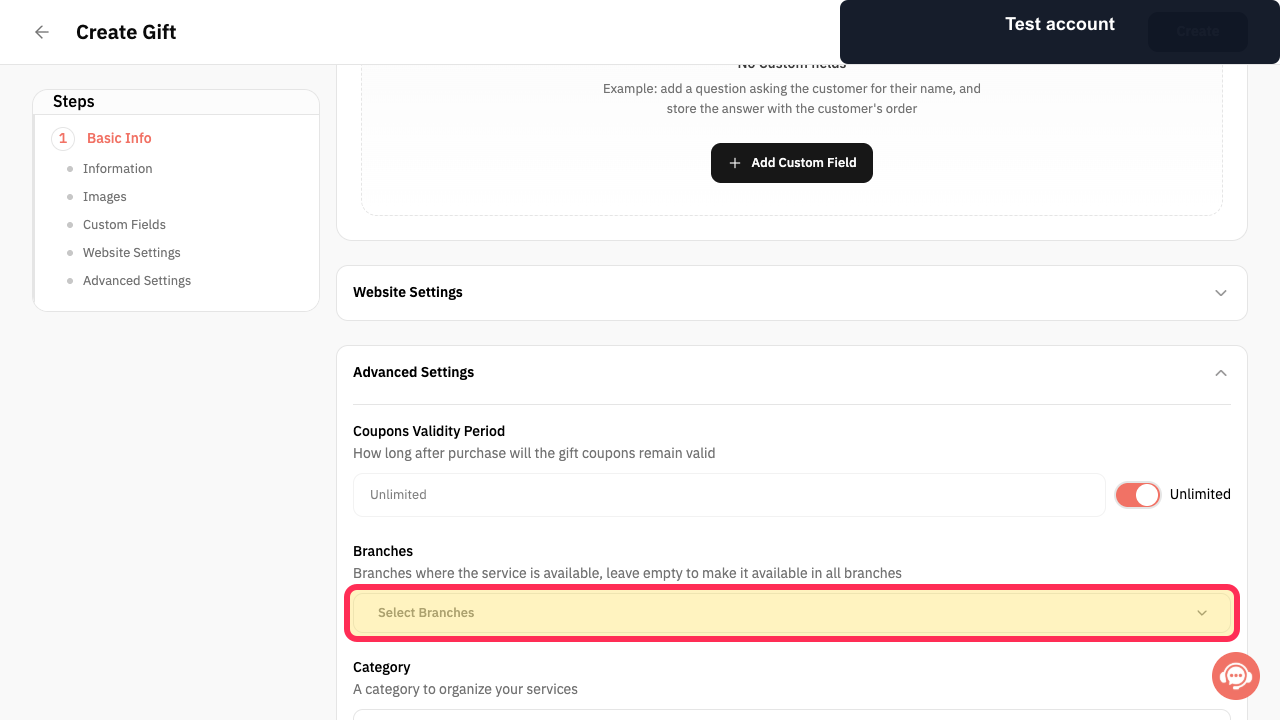
Step 14: Choose a category for the Gift.
Step 15: Create the Gift service.
Important notes
You can leave Branches empty to make the gift available to everyone, according to the text shown in the interface.
The recorded walkthrough did not create a gift or a gift coupon, so successful creation was not verified in that recording.
Related questions
How do I create a gift coupon in Rekaz?
How do I set a gift amount and validity period in Rekaz?
How do I add a gift that appears on my website in Rekaz?


