How do I add or change my website logo in Rekaz?
To add or change the logo shown on your website in Rekaz, open Website Settings, select the Basic tab, upload a new Brand Logo, and save.
For best results, use a clear, lightweight logo file sized around 400 × 100 px. Do not upload files containing customer or employee information.
Steps
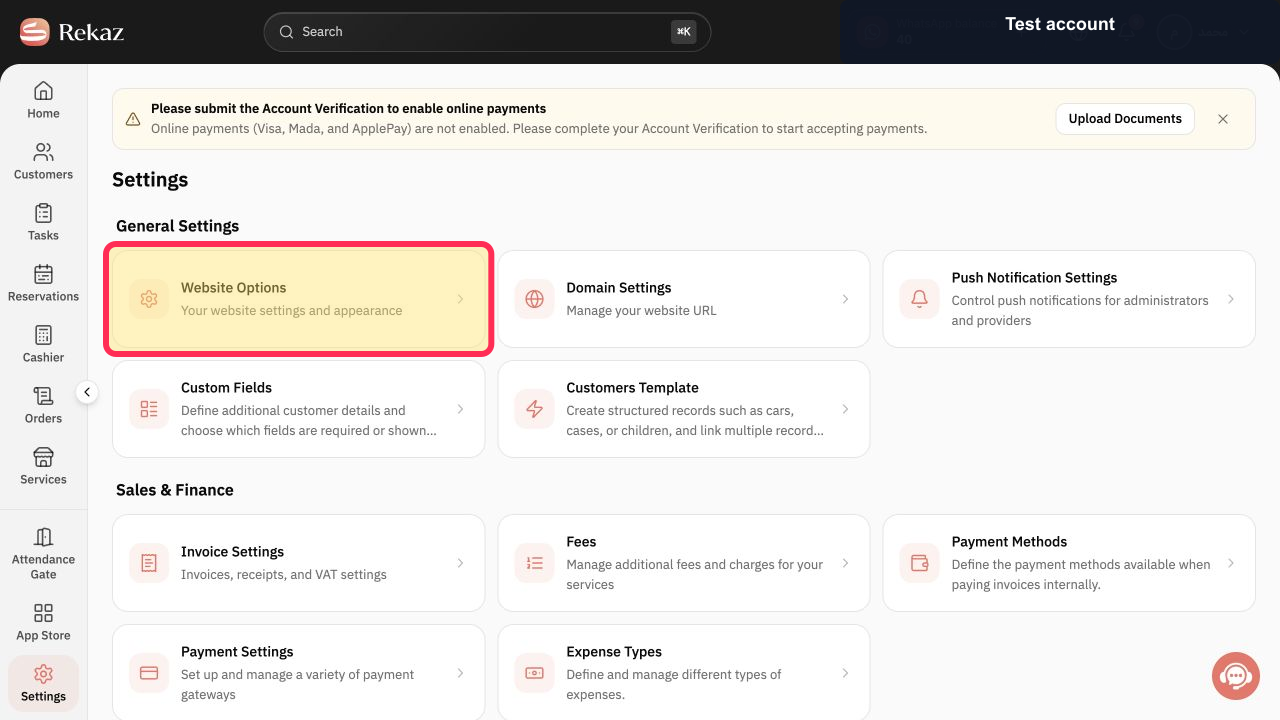
From the signed-in Rekaz dashboard, open Settings in the sidebar, then go to Website Settings.
The Website Settings page opens.
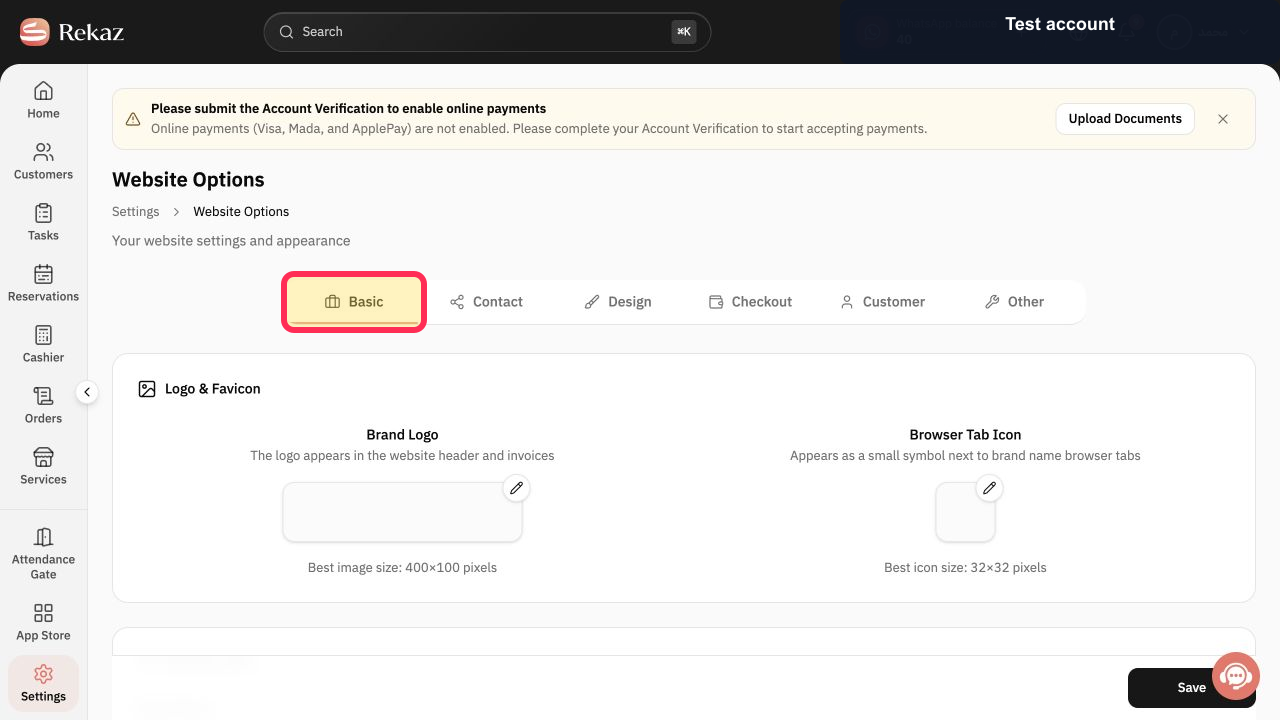
Select the Basic tab.
The Basic website settings are displayed, including Brand Logo.
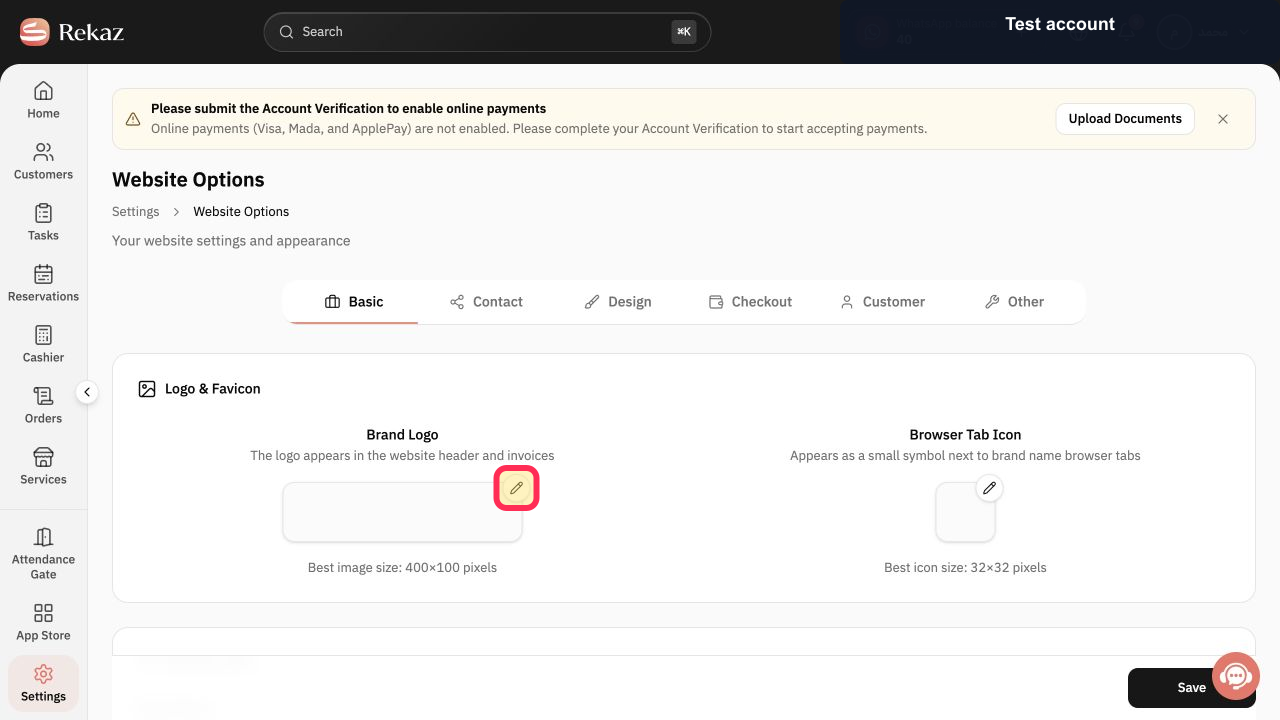
At Brand Logo, select the edit icon and upload the logo file you want to use.
The selected logo is shown as the Brand Logo.
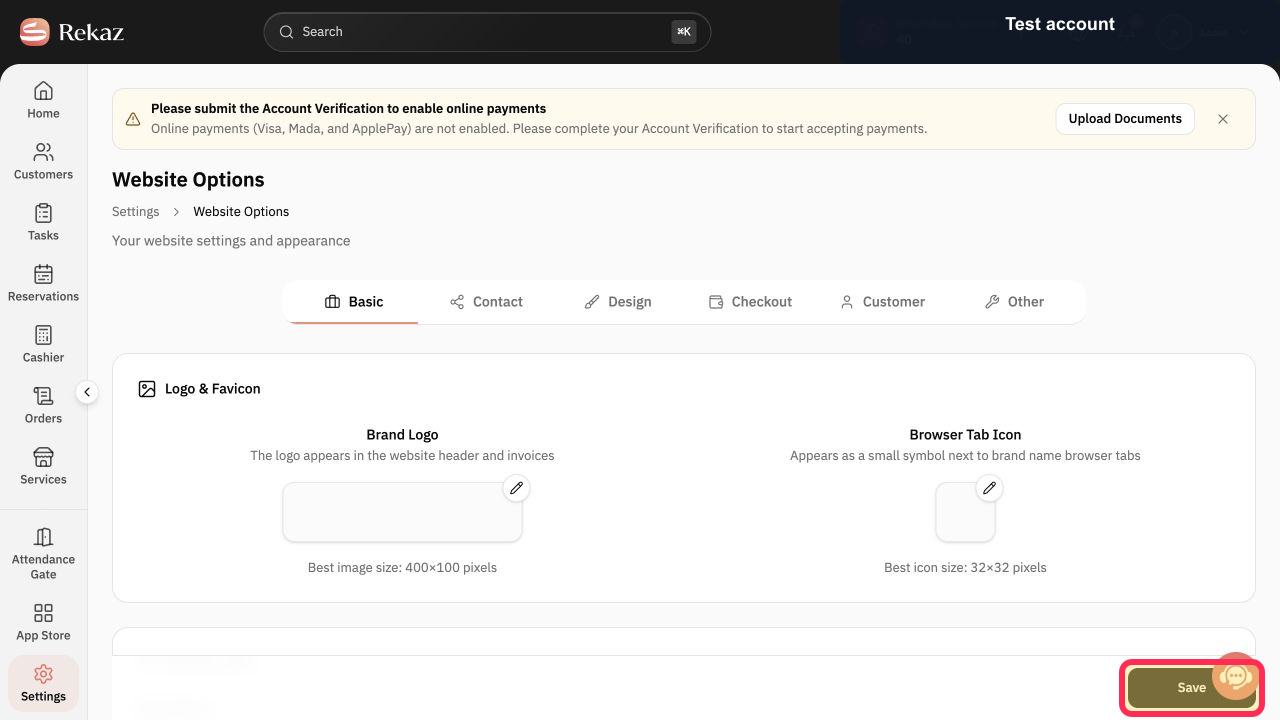
Select Save.
Your website logo changes are saved.
Illustrated guide
Step 1: Open Website Settings in Rekaz.
Step 2: Open the Basic tab.
Step 3: Edit and upload your Brand Logo.
Step 4: Save the updated website logo.
Logo recommendations
Rekaz displays a preferred logo size of 400 × 100 px.
Use a clear, lightweight image file. Do not include customer or employee data in the file.
Related questions
How do I change the logo shown in the corner of my website in Rekaz?
Where can I find the option to add or change my website logo in Rekaz?
What are the steps to update my website logo in Rekaz?


